- What is optimization?
- File size optimization
- File format optimization
- File compression optimization
- Lossy image compression
- Lossless image compression
- File name optimization
- Image SEO (Search engine optimization)
- Alt attribute
- Title attribute
- Image optimization and compression tools
- Programs and applications
- Online tools
- WordPress plugins
- How to check the effects of image optimization?
- Online tools to check website speed
Do you want your website to rank high in the search results? Do you want to have the greatest possible impact on the positive reception of the content on it? If so, read the article about how to optimize images for web.
Using photographs or illustrations on the website can bring many benefits. Besides the visual aspect, graphics provide one more advantage. They can encourage new users while browsing the Google Graphics to find and check your website.
Photos taken by you or illustrations created for your article will probably receive more attention than photos from stock photo banks. This is because we are not fully aware of how many people and in what context used the same photo as we did.
Regardless of whether we buy photos, use free graphics, or use our own photos, it is worth learning about the methods of their optimization.
What is optimization?
Let’s start by explaining the term itself. Optimization, understood in a broad sense, is to simplify a process and obtain the best possible result. When it comes to photos and graphics for the web, it means reducing the weight of files without significantly affecting the quality of the photos. Adding huge files straight from your camera or full-size photos from stock photo banks is not good for your website. It significantly overloads and slows it down.
Imagine that you are the owner of an online store where each product is illustrated with several photos in full resolution. Your offer grows and you add more product photos without prior optimization. Individual subpages take a long time to load, and your store, instead of encouraging, discourages users staying on the site. What is also important, the page loading speed is one of the most important factors that affect the ranking of the Google search engine.
However, this is not the end of your task. After proper preparation of graphic files and uploading the photos to the media library in WordPress, you should optimize images for SEO. About this in a moment. Let’s start from the beginning.
File size optimization
Regardless of whether we have a professional graphic program or use free online tools, in both cases we can reduce the size of the files. Scaling or cropping are simple yet effective ways to reduce the weight of a file.
At the beginning, it is worth checking what dimensions are provided for the photo that will be displayed on the website. It is enough if we add a photo in the size that will appear on the Full HD monitor.
Keep the aspect ratio of the original when scaling a photo. However, if you want to place graphics with a specific width-to-height ratio, or you want to show only a fragment of the graphics, opt for cropping. In both cases, I recommend that you keep the original file so that you can return to it if necessary.
File format optimization
It’s time to choose a format. The most common image files on the Internet are .JPG and .PNG files. Apart from them, the websites also contain files with GIF, SVG, WEBP extensions.
So what format should you choose?
JPG is perfect for photos.
PNG, like JPG, is a raster file format, but it is intended for all kinds of digital graphics, charts, screenshots or files with transparency.
The GIF format will be suitable for presenting simple image sequences.
Scalable SVG vector file is much lighter than the rest. It is used to save icons, logos or vector illustrations.
WEBP is a next-generation format developed by Google. It is a competition for the well-known raster graphics formats that I mentioned earlier, i.e. JPG, PNG and GIF. So it is universal as it supports both transparency and animation. The main benefit of using this format is also the high compression of graphics.
File compression optimization
Compressing an image means reducing its size and therefore the weight of the file. There are two types of compression: lossless and lossy.
Lossy image compression
This is an irreversible compression method that removes some of the photo’s data while keeping it to a decent quality. In other words, lossy compression reduces the weight of the photo at the expense of its quality. However, with a small degree of lossy compression, we are still able to obtain good quality graphics. Lossy compression formats are JPG and WEBP (the latter also support lossless compression).
Lossless image compression
Unlike lossy compression, this method reduces the file size without losing image quality. Usually, however, the file’s metadata is removed. The lossless compression formats are PNG and WEBP.
File name optimization
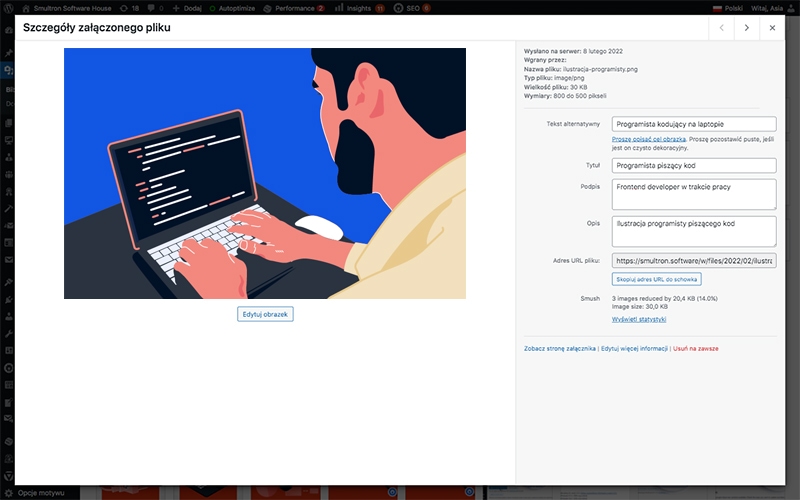
Take a moment to think about the filename. This trivial task is very important for the optimization and indexing of the search engine result. The filename should be short but descriptive. Do not use diacritical marks. Instead, separate individual words with a hyphen “-“. How does it look in practice? Let’s see an example of an illustration designed by me.

I saved the above graphic as an illustration-programmer.png. In just two words separated by a hyphen, it reflects the content of the illustration. Remember not to separate individual words with a space or an underscore “_”.
When it comes to photos, their original names are often based on a string of numbers, for example: IMG_2124.jpg. Let’s consider the context of both the article and the photo and choose a short, concise name, and if possible, add matching keywords. An example of the name of a photo may be: krakow-main-square.jpg
Image SEO (Search engine optimization)
Finally, our graphic file can be uploaded to the media library in WordPress. It has the right size, weight, format and a proper name. We have another task ahead of us: image SEO optimization.
I mentioned earlier about naming the image file properly. Right after uploading our graphics to WordPress, we should fill in the fields: Alternative text and image title.

Alt attribute
Let’s start with the most important field, which is alternative text. This is text that describes the content of the graphic and is useful for several reasons:
- It improves the accessibility of your website. Alternative texts, unlike the graphics themselves, are available to blind people who use screen readers. If you are interested in the subject of accessibility, see two articles on our blog: WCAG compliance: introduction and WCAG guidelines – levels and criteria.
- Indexing robots can read the content in the ALT attribute. Alt text allows them to understand the purpose of the image. As a result, it helps in positioning the page in the search engine.
- Describes a graphic that for some reason is temporarily not visible on the page.
Title attribute
The next field to fill in is the title of the image. The user is more likely to see the title of the image than the alt text. It will appear when you hover the cursor over the graphic you are interested in. So it’s worth filling it in, although for SEO it doesn’t matter as much as the alt text or the file name.
It is mainly up to us what on our website can be interpreted by robots whose task is positioning. The more effort you put into preparing accessible content, the better for you. Try not to duplicate identical descriptions in the photo name, alternate description, and image title.
Image optimization and compression tools
Below you will find some examples of tools that can help you reduce the weight of your image files.
Programs and applications
- Photoshop with the “Save for Web” option
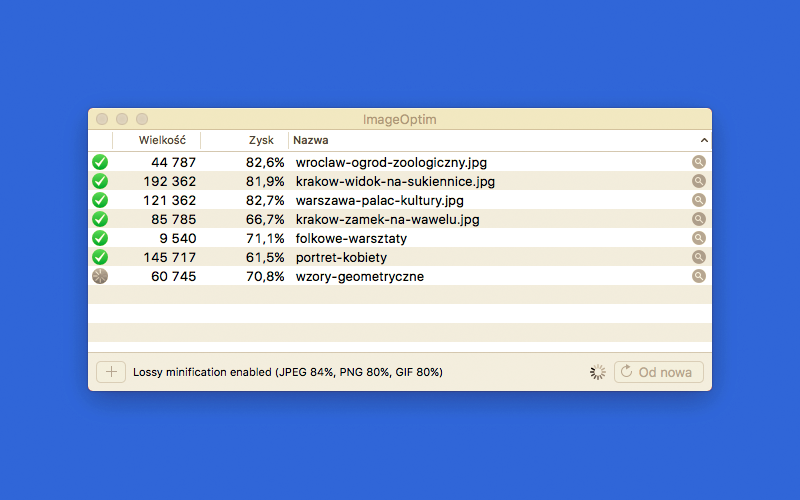
- ImageOptim for MacOS
- Riot

Online tools
It is worth optimizing images before sending them to the media library, but you can additionally support the optimization process by installing a WordPress plugin.
WordPress plugins
How to check the effects of image optimization?
We’ve gone through all the steps, so it’s time to check out the image optimization results. Below you will find links to online tools that will analyze your website for performance.
Online tools to check website speed
We sincerely hope that this article will prove helpful for you. If you have any comments, please let us know on our Facebook fanpage 🙂


